

Instances
The Infrastructure › Instances screen is used to display a list of all Instances that have been set up in the WISdom collection environment. Instance information is displayed in a table format with sortable columns in the Instances section. See what each instance costs next to how busy it is, from CPU and memory to transactions and batch requests per second, and how fast its databases are growing.
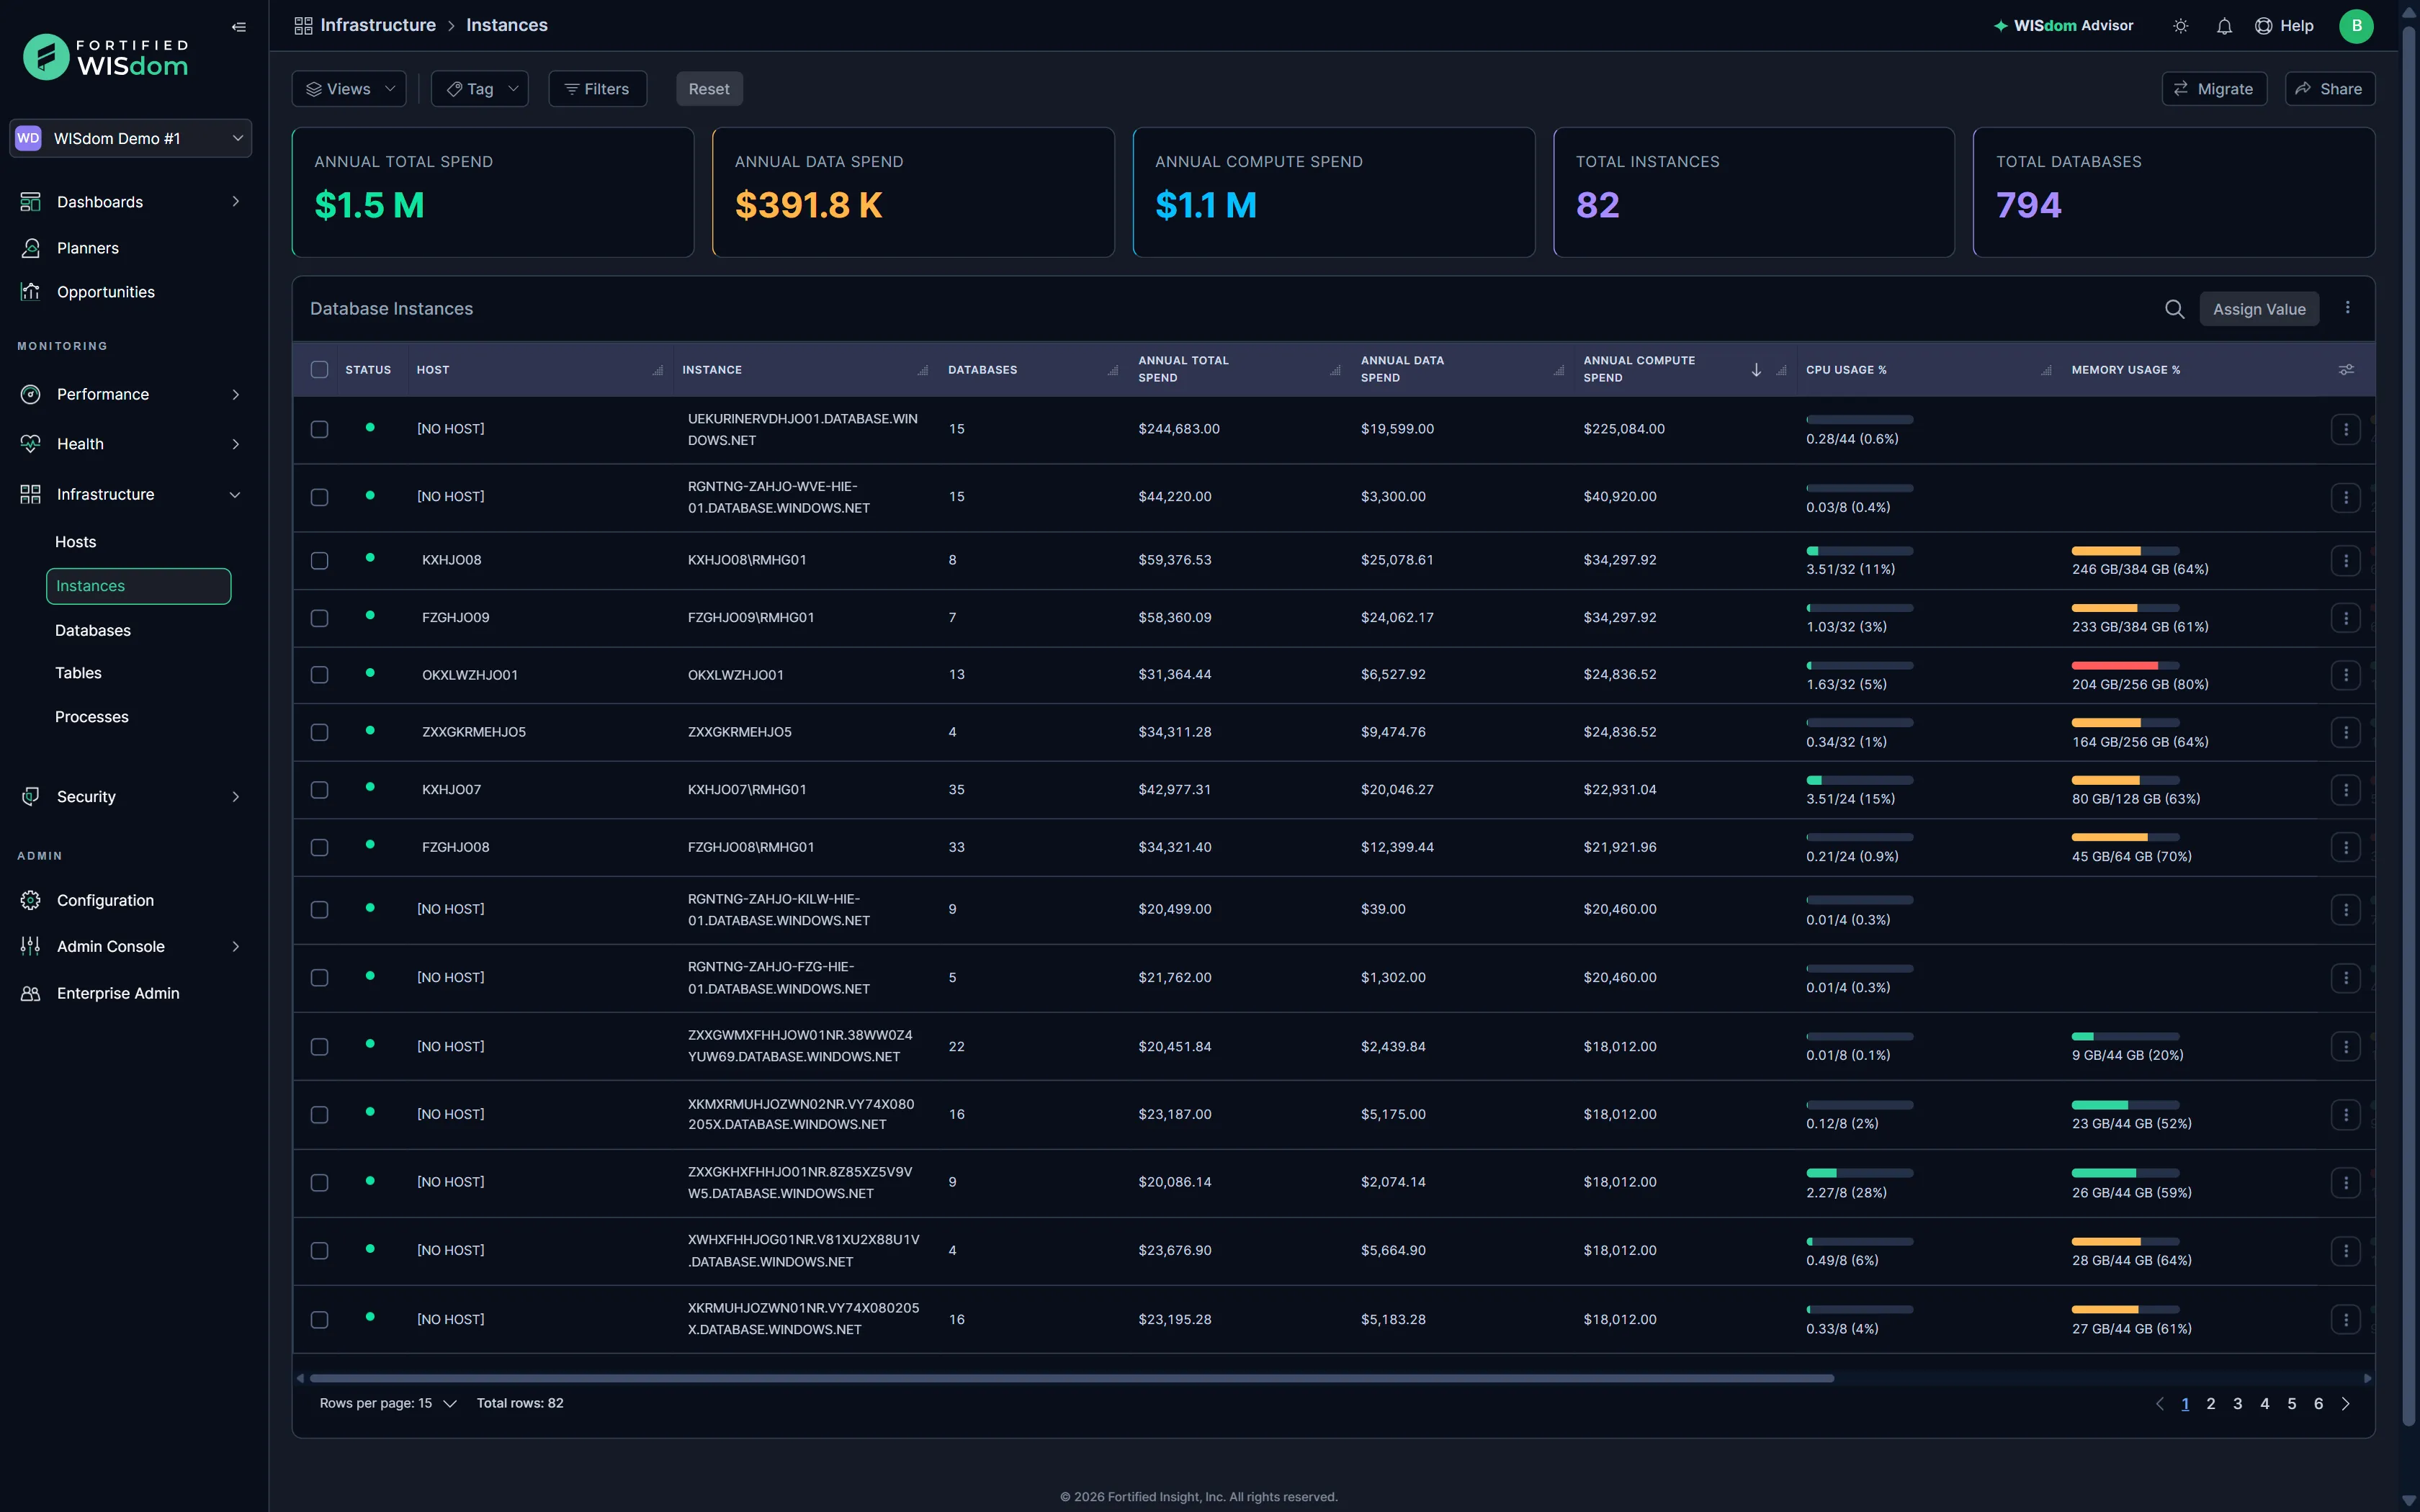
The screen can be modified by selecting a View and applying it, or by using the Tag or Filters drop-downs. Select Apply to apply your selections or Cancel to discard them, and select Reset to clear all active filters.
The Tag drop-down includes the system-generated tags that apply to the page and any custom tags you have created, such as an Application tag. The system-generated tags are [Environment], Auto-Discovered Resource, Availability Group, Collection Status, Listener Name, and Top 10% Instances. [Environment] tags may be edited on the Tags page in the Admin Console, if your WISdom account has the appropriate permissions. The other system-generated tags cannot be edited.
The Filters drop-down offers Host, Instance, Edition, Monitoring, and Data Collector.
The Search area (magnifying glass in the upper right corner of the screen) provides the ability to search for a string or name, further limiting the Instances displayed in the Instances table.
Select an instance row to open Databases with the instance name applied as a filter. This is the same as selecting View Databases from the row-level action icon. The host filter is not carried over.
To choose which columns are displayed, select the column chooser icon in the upper-right corner of the table and toggle columns on or off. Your selections are kept in your browser cache and persist until the cache is flushed. To export the data, use Export from the action icon (three vertical dots) in the table’s header row. Export creates an Excel file with all available columns, regardless of which columns are displayed. It does not ignore filters: only the data that matches the filters currently applied is exported.
Instances
Section titled “Instances”The Instances table lists the SQL Server instances that have been added to WISdom for monitoring, in sortable columns. Columns marked Default in the table below are displayed until you change them with the column chooser.
Spend depends on host information. WISdom applies cost to a resource using the host it runs on, so a cost can only be calculated when host information has been collected. Without host information, or without cloud cost information where it applies, spend may not display. You may see $0 amounts or charts with no data. See Cost Management for how costs are defined.
Columns
Section titled “Columns”| Column | Default | Description |
|---|---|---|
| Status | Yes | The current monitoring status of the instance, shown as a dot. Green represents healthy monitoring with no errors. Red represents unhealthy monitoring; check the Collector Health screen for more information. |
| Host | Yes | The name of the host. The name is populated when an instance has been added and the collector retrieves the @@ServerName from the SQL Server instance. |
| Instance | Yes | The instance name. |
| Databases | Yes | The count of databases on the instance. |
| Annual Total Spend | Yes | The total annual spend for the instance. |
| Annual Data Spend | Yes | The annual storage cost for the instance. |
| Annual Compute Spend | Yes | The annual cost of the CPU cycles consumed by the instance. |
| CPU Usage % | Yes | CPU usage of the instance, as a percentage. |
| Memory Usage % | Yes | Memory usage of the instance, as a percentage. |
| Storage Usage % | Yes | Storage usage of the instance, as a percentage. |
| Resource Pressure | Yes | Badges for the resources flagged as under pressure: CPU, Disk, and Memory. |
| Virtual Name | No | The virtual name associated with the instance, when it has one. |
| High Availability | No | A badge showing the high availability configuration of the instance, such as AG (Availability Group) or FCI (Failover Cluster Instance). |
| Platform | No | The platform of the instance. |
| Environment | No | The environment assigned to the instance. You configure this value. |
| Tier of Service | No | The tier of service assigned to the instance. You configure this value. |
| Product Version | No | The SQL Server product version. |
| Edition | No | The SQL Server edition. |
| Patch Level | No | The SQL Server patch level. |
| Port | No | The port the instance listens on. |
| Monitoring Profile | No | The monitoring profile assigned to the instance. |
| Last Restart Time | No | The date and time of the last restart of SQL Server. The restart time is determined by the created date of tempdb. |
| Annual Database Growth % | No | The annual growth of the instance’s databases, as a percentage. |
| Annual Database Growth Size | No | The annual growth of the instance’s databases, as a size. |
| Transactions/sec | No | The transactions per second on the instance. |
| Batch Request/sec | No | The batch requests per second on the instance. |
| Data Collector | No | The data collector that monitors the instance. |
| Time Zone | No | The configured time zone of the instance. |
| Tags | Yes | The tags associated with the instance. |
Row actions
Section titled “Row actions”Select the row-level action icon (three vertical dots at the end of a row) for more options:
- Edit - Manage the tags associated with the instance. Edit only manages tags. See Assign value / edit below.
- View Databases - Open Databases with the instance applied as a filter. Selecting the row does the same.
Assign value / edit
Section titled “Assign value / edit”The only information you can edit on this page is Tags. The primary editing related to an instance’s information will be done in the Collections - Resources section of the Admin Console screen.
To edit a single instance, select the Three-Dot icon at the end of the row and select the Edit button. A flyout will appear with the option to edit the Tag(s) associated with the instance. To edit Tags for more than one instance at a time, check the boxes in front of the instance names, then select the Assign Value button at the top-right.
When an instance is selected via the check box at the beginning of the row, the Migrate button becomes operational. When selecting the button, the servers checked will be prepopulated but may be modified when the Migration Recommendations pop up displays. See the Migration page of the User Guide for more details.