Date Time Range Selection

This tool provides various methods in selecting a date and time range for the Database, Monitoring, and Compliance modules.
- Click on the Calendar icon to access the Quick Select option
- Click on the dates in the above image or the Last X Days/Minutes/Hours in the image below to access the Select the Start and End Times option
- Selecting a Time Range visually via a Chart on various screens
Any date/time range selection will persist between screens in the modules.
Quick Select
Selecting the shaded area containing calendar icon on the left side of the date time range selector will display the Quick Select view.
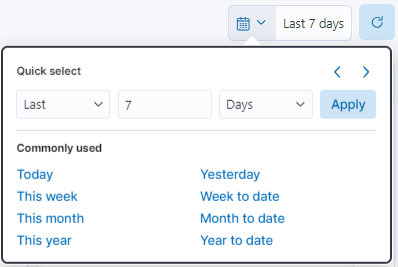
Once the drop-down selector is displayed, there is the Commonly Used section that contains 8 choices. All 8 choices key of today's date, not a date selected.
The top area allows the defining of the previous amount of time that will be displayed on the screens. The options are seconds, minutes, hours, days, weeks, or months. Years is an option, but WISdom does not retain data for numbers of years.
Note: Some screens will not display data when less than a 1 hour time range has been selected, like Query Statistics.
Select the Start and End Times
Selecting the text portion of the Date Time Range Selection provides the opportunity to specify explicit time stamps for both the start and end times. As the image below displays, when clicking on the Last X time or the explicit date time stamps, a drop-down is displayed and allowing the selection of the start day and time. Clicking on the end date and time or in the image the now, the same drop-down selector will display but anchored to and impacting the end time.
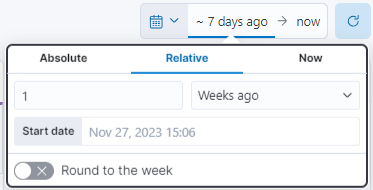
The Relative tab (displayed above) allows the defining of the time range relative to today. Both the start and end date may be selected based on a defined number of units of selected time from the current date and time, I.E. 7 Days ago or 1 Week ago. The functional options are seconds, minutes, hours, days, weeks, or months.
The [Start Date] will display the actual date and time based on the selection. If the nearest whole hour, month, or year is desired, the toggle switch at the bottom will allow the enabling of rounding. Seconds and minutes can be toggled, but the collections are at a minute granularity, to enabling the rounding will not impact the date and time.
The Absolute tab allows a specific date and time, down to the minute, to be defined for either the start date or the end date. The image below displays the Absolute selector for the Start Time.
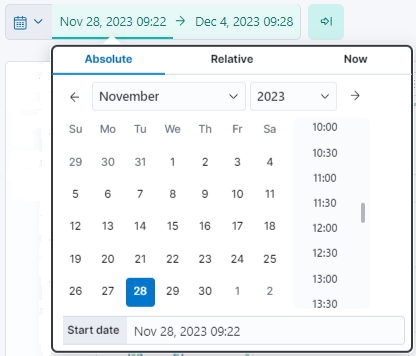
- The arrows on the left or right of the month and year allow for easy navigation forward or backward a month in the calendar view.
- A click on the month or year will provide a drop-down list of all the months or the prior year if the data is available.
- Select the date desired, then the time may be select in half hour increments along the right side with the scrollable time selector.
- The Start Date line allows the entry of a specific month, day, year, and/or time to the minute level.
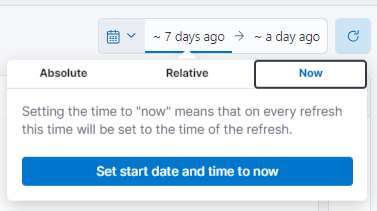
The Now tab allows the quick setting of the current date and time. Primarily used for the end time.
Selecting a Time Range on a Chart
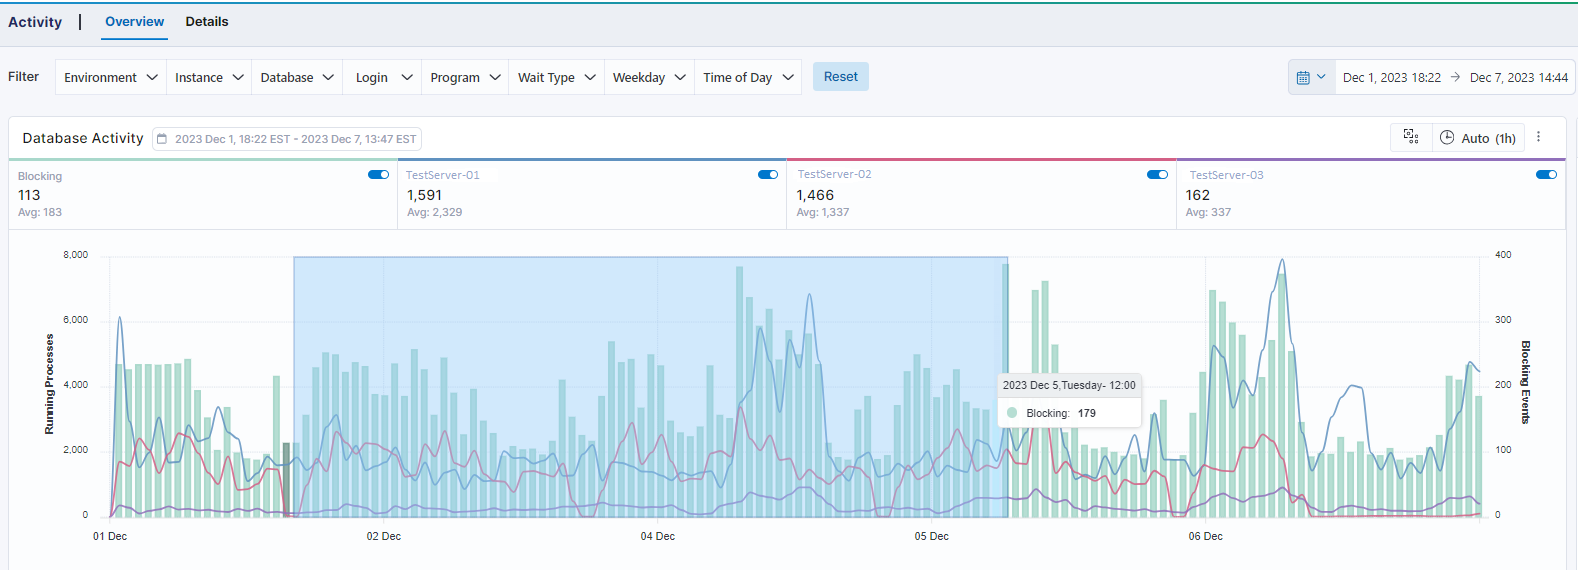
Most charts in the Activity, Blocking, Deadlocks, and Resource Health screens allow for the selection of a more granular time range by selecting the range on the chart. Click and drag the selector in either direction to select a subset of the existing time range. This will update the begin and end time based on the aggregate plot points selected in the chart (days, hours, or minutes).
In the example below, the original time range is Dec 1, 2023 18:22 - Dec 7, 2023 14:44 and the plot points are aggregated at 1 hour. The shaded section selected is Dec 2, 2023 12:00 - Dec 5, 2023 12:00, this was done by finding the desired start time, Dec 2, 2023 12:00, clicking, holding, and dragging the mouse to the desired end time, Dec 5, 2023 12:00. Once the button has been released, the time range will be updated to the selections and all the data on the screen will update to reflect the new time range, including the chart.