WISdom Single Sign-On (SSO) Process
Overview
With SSO enabled for a client in WISdom, the sign-on process will be updated. User credentials will no longer be authenticated by Fortified Okta; instead, authentication will be handled by the network authentication methods specified in the SSO configuration.
This guide provides step-by-step instructions for WISdom users to sign in using the Single Sign-On (SSO) feature after it has been successfully configured, tested, and saved.
Sign-On Process
-
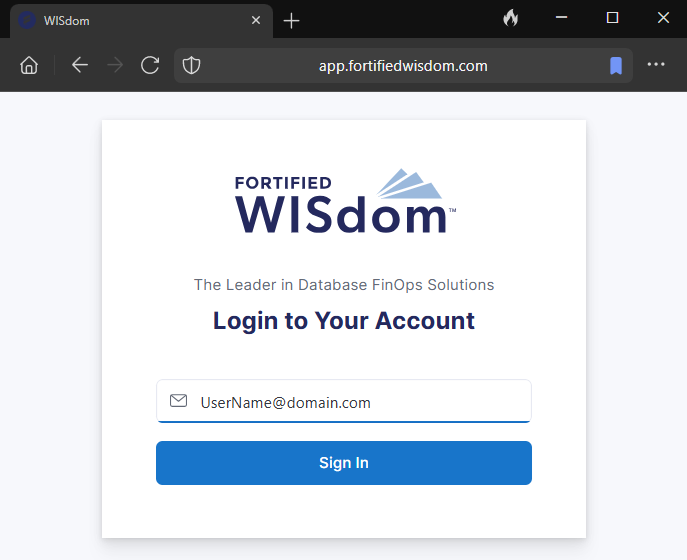
Access the Login Screen
- Open your web browser and navigate to the WISdom login page: https://app.fortifiedwisdom.com/login.
-
Enter Your Account ID
- In the login screen, enter your account ID (email address) in the designated field.
-
Initiate Sign-In
- Click on the "Sign In" button. You will be redirected to your network authentication screen.
-
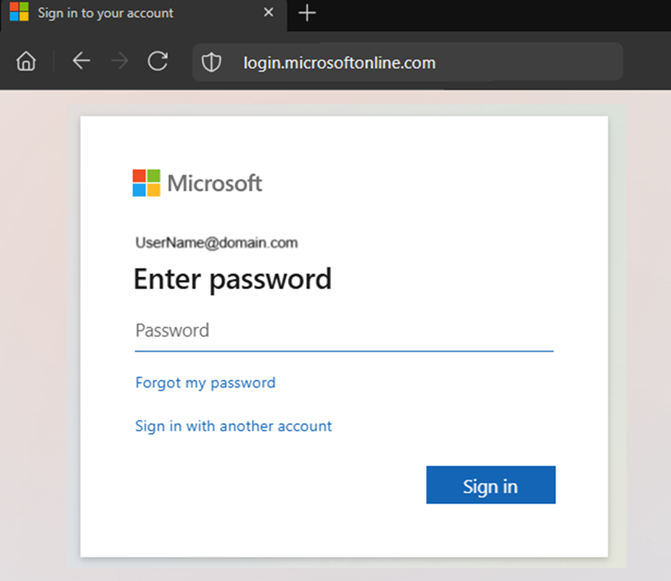
Network Authentication
- You will be directed to your configured network authentication screen.
- If you are using a Microsoft authentication account, you will see a login screen similar to the one below:
- You will be directed to your configured network authentication screen.
-
Enter Your Network Password
- Input your network password in the provided field and click "Sign In."
-
Authentication Options
- After signing in, you may be presented with options to make selections regarding your authentication. Choose either "No" or "Yes" based on your preference.
- If you are using a Microsoft authentication account, you will see a login screen similar to the one below:
- After signing in, you may be presented with options to make selections regarding your authentication. Choose either "No" or "Yes" based on your preference.
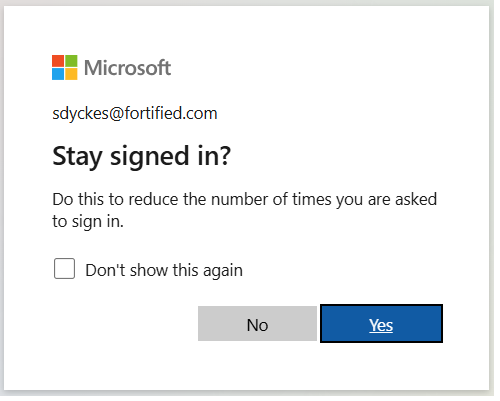
- Access WISdom
- Once you have made your selection, you will be redirected to the Home Page of WISdom for your client account.
Conclusion
You are now successfully signed in to WISdom using the SSO process. If you with the first sign-in screen from WISdom, please capture any errors and/or screenshots and open a support ticket with the Fortified WISdom Support Team.
If you encounter issues with the secondary sign-in screens, please contact your system administrator for assistance.