Process Overview for Setting Up Okta SSO with WISdom
To integrate your own identity provider with WISdom, you will need to configure settings in both WISdom and your identity provider, in this case, Okta. This document will guide you through the following steps:
-
Create an OIDC Compliant Application in Okta
- Set up a new application in your Okta account specifically for supporting WISdom SSO.
-
Generate WISdom SSO Credentials
- Create the necessary SSO credentials for the newly created application.
-
Verify ID Token URL
- Ensure that the Okta OpenID Connect ID Token URL is static.
-
- Adjust the Okta application settings to enable a trust with WISdom.
-
Retrieve Configuration Values
- Collect various configuration-related values from the newly configured application in Okta.
-
Enter Values in WISdom
- Input the retrieved values into the WISdom SSO configuration window.
-
Test the Authentication Method
- Conduct tests to verify that the new authentication method is functioning correctly.
-
Save Authentication Credentials
- Save the working authentication credentials and enable SSO for all WISdom accounts on the Team page.
Note: WISdom SSO currently support Client Credentials only, not PKCE for verification.
Create a new Okta App Integration under Applications
- Log in to Okta Admin Console:
- Navigate to your Okta Admin Dashboard.
1. Create a OIDC Web Application
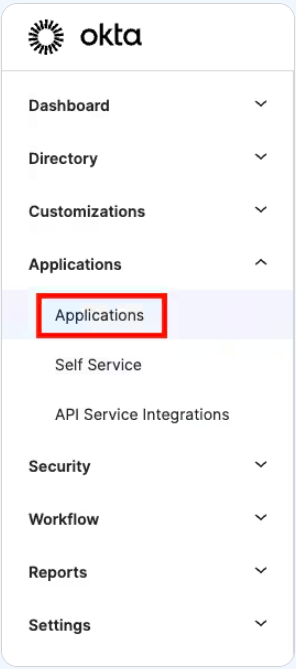
- Go to Applications:
- In the left-hand menu, select Applications > Applications.
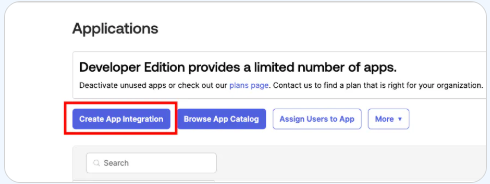
- Add Application:
- Click the Create App Integration button.
-
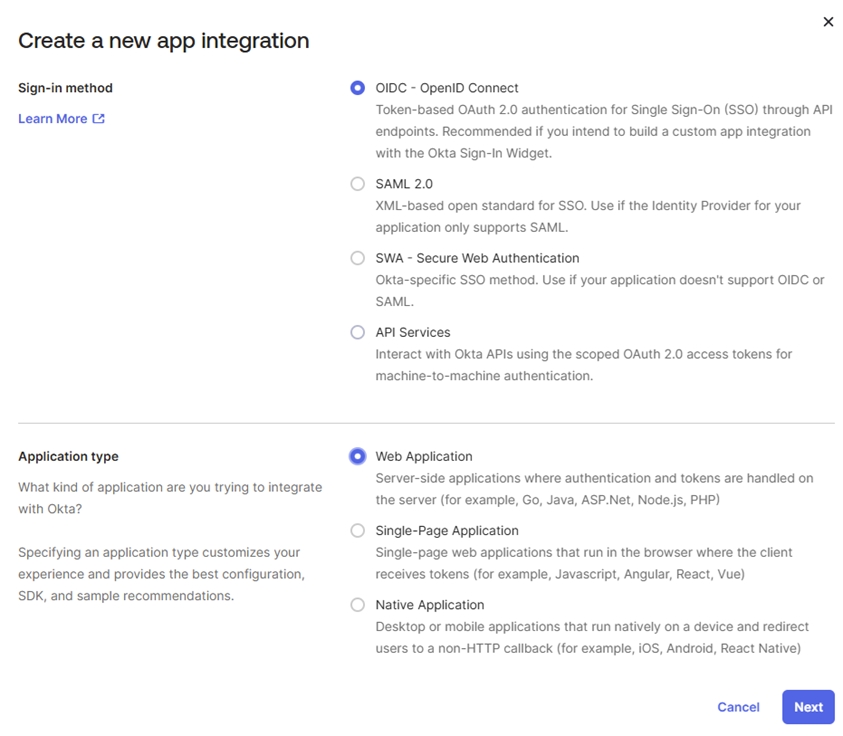
Select Sign-in Method:
- OIDC - OpenID Connect is used by WISdom.
- Other options are available that are not compatible with WISdom, SAML 2.0, SWA (Secure Web Authentication), or API Services.
- OIDC - OpenID Connect is used by WISdom.
-
Select Application Type:
- Web Application
2. Generate WISdom SSO Credentials
-
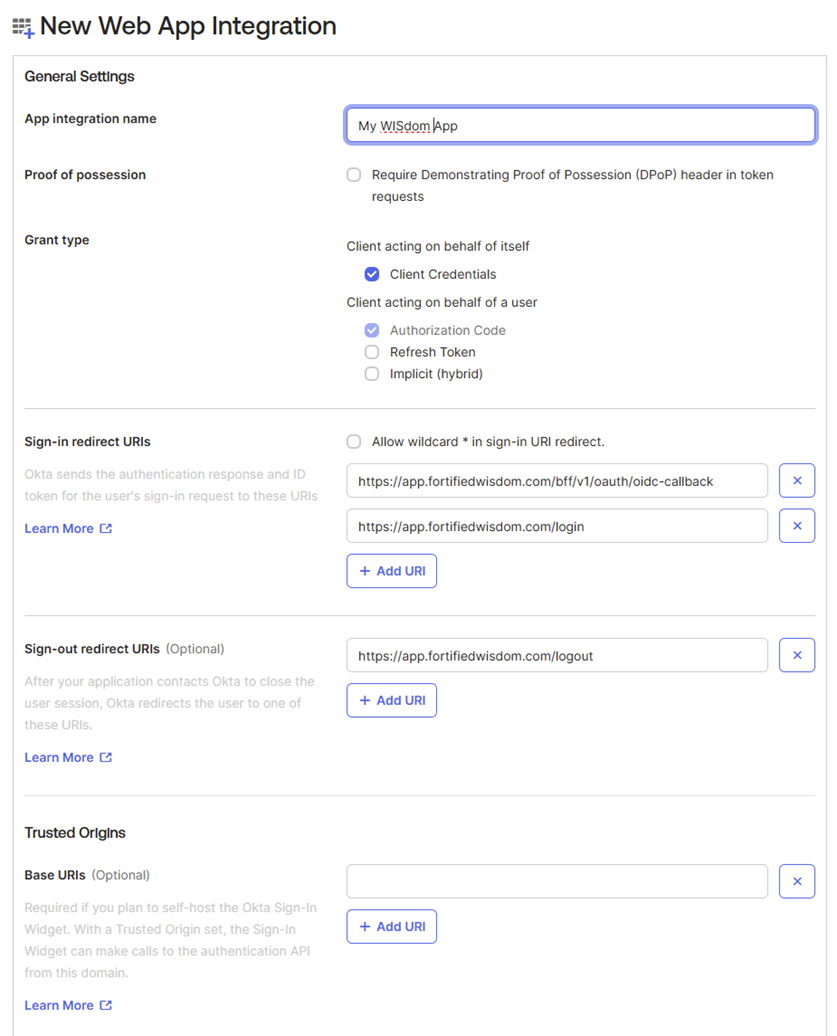
Provide a name for the application:
- We recommend WISdom or Fortified WISdom
-
Do not require DPoP
-
Define Grant Type:
- Select Client Credentials for "Client acting on behalf of itself
- Authorization Code should be defaulted
- Select Client Credentials for "Client acting on behalf of itself
-
Setup Sign-in Redirect URLs:
- Add 2 URLs for the redirect
- https://app.fortifiedwisdom.com/bff/v1/oauth/oidc-callback
- https://app.fortifiedwisdom.com/login
- Add 2 URLs for the redirect
-
Define the Sign-out redirect URLs :
- https://app.fortifiedwisdom.com/logout
-
Assignments Configuration:
- Assing a group that will be accessing WISdom or leave Everyone as the default
- Users without an account configured and assigned in WISdom will not have access, so Everyone works well
- Assing a group that will be accessing WISdom or leave Everyone as the default
-
Saving the Data
- Saving the data will generate the Client ID and and Client Secret
Collect the General Information of the New App
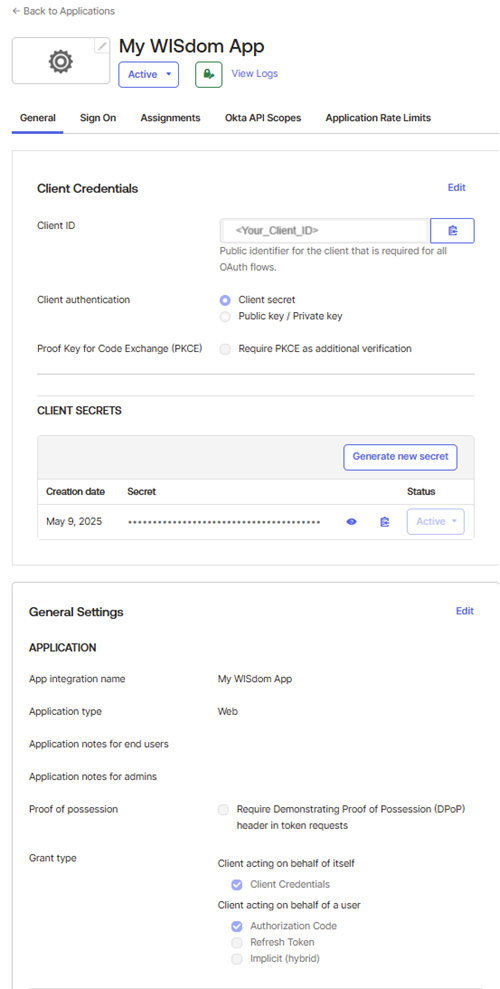
This information will be required in the WISdom SSO Wizard to set up the SSO Authentication in WISdom. Once the application has been created from the steps above, navigate to the General tab. Here, you will copy and save the data for the WISdom SSO configuration steps.
-
Collect the Client ID
- Use the Copy icon to quickly copy the Client ID
- Store the data for input into WISdom SSO Wizard
-
Copy the Client Secret
- Use the Copy icon to quickly copy the Client Secret
- Store the data for input into WISdom SSO Wizard
3. Configure Static Token Issuer
Set the token issuer to a static value rather than dynamic. This ensures that the SSO token validation process can accurately identify the issuer's address for credential verification.
4. Configure Trust Settings
Now we need to configure Okta to trust the WISdom URL, https://app.fortifiedwisdom.com. This is accompished following these steps:
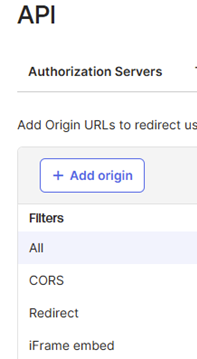
- Navigate to the Security - API screen in Okta.
- Select the Trusted Origins tab
- Click the [Add Origin] button
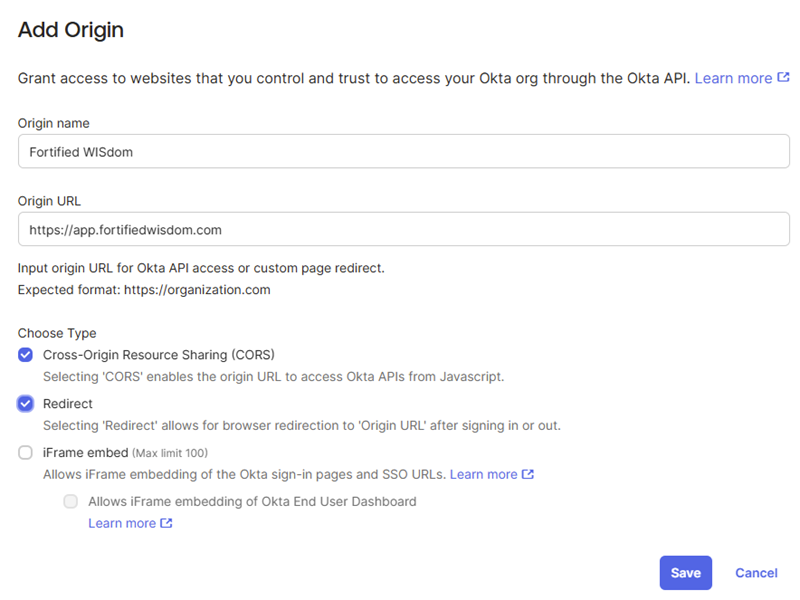
- Provide a name for the new Origin
- We recommend WISdom or Fortified WISdom
- Populate the Origin URL with the WISdom URL
- https://app.fortifiedwisdom.com
-
- In the Choose Type area
- Select Cors
- Serlect Redirect
- In the Choose Type area
- Save the configuration
Read Configuration Settings from your Okta Application
Now that the application is setup, the simplest way to see all the configuration values you need for setup is to go to your account endpoint to see the values in JSON format. Make sure you use the right domain.
https://[YOUR OKTA ACCOUNT DOMIAN]/.well-known/openid-configuration
- Copy values for
- Use “jwks_uri" to get the Public Key URL
- “token_endpoint" to get the Token URL
- This URL will be appended with URL\OAuth2\[ClientID]
- “authorization_endpoint" to get the Authentication URL
- “issuer" to get the Token Issuer
- Enter these values for your SSO configuration with WISdom along with your Client Credentials