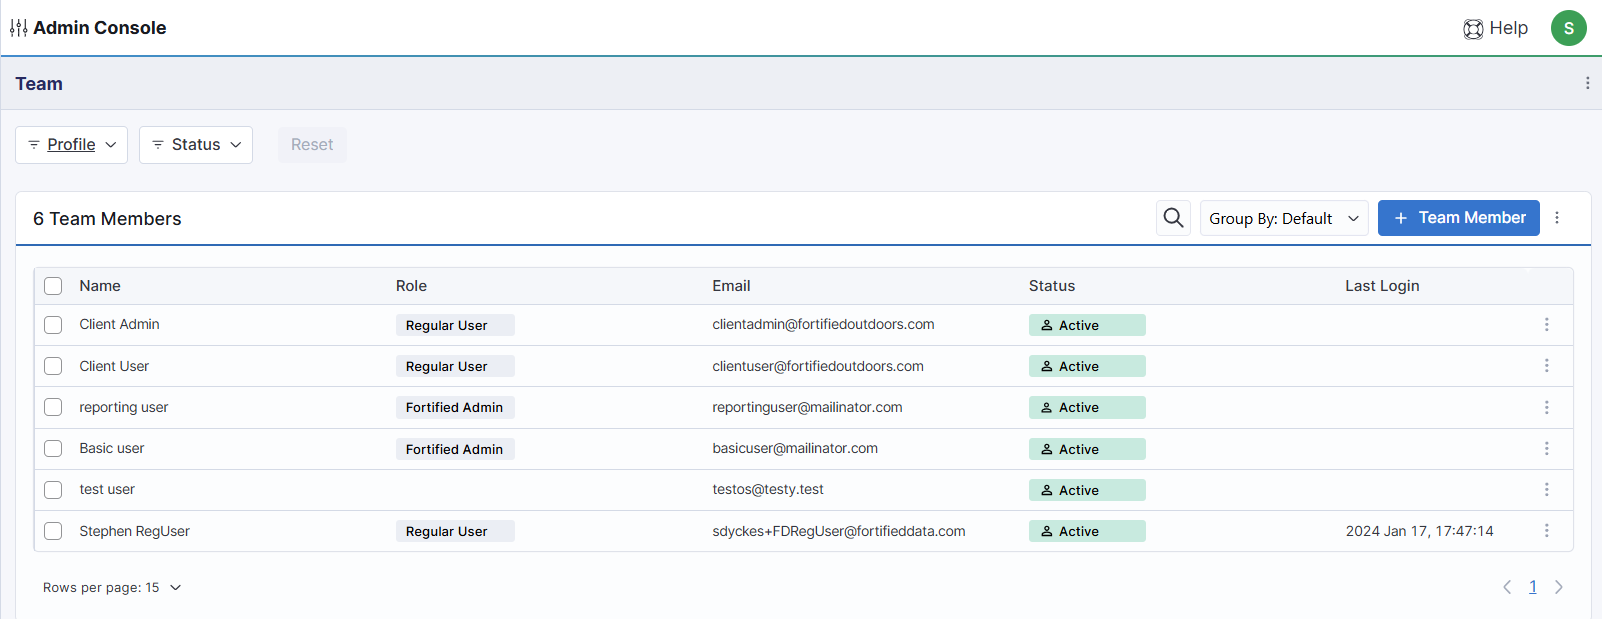
The Team screen provides information related to all WISdom users for the account.
Managing Existing Accounts
The results displayed on the screen can be filtered with the drop-down filters consisting of Profile and Status.
The page will display a table containing various information for each user that has been added to the team in WISdom. The title bar above the table displays the total Team Members. (see image below for an example)

The data consists of information related to the Team Members added to the account. The columns are:
- Name - The name of Team member.
- Role - The assigned Account Role (Billing Contact, Primary Contact, Secondary Contact).
- Profile - The user role assigned to that Team Member (Administrator, Regular User, MSP Administrator).
- Not all profile options are available for all accounts.
- Title - The work or business designation of the user.
- Status - The current status of the Team Member (Active, Invite Sent, Not Invited, Deactivated).
- Last Login - The date and time of the Team Member’s last login, if available.
All columns are sortable (click on the column name to sort) and searchable (click on the magnifying glass and type the search criteria). Next to the search area is the Group By drop down, allowing the data to be grouped by Role, Email, or Status.
To view or manage the accounts the three vertical dots at the end of the rows may be used to display account management options:
- Edit opens the Edit Team Member flyout.
- This allows editing of First Name, Last Name, Email, Phone, and Role.
- Deactivate deactivates a user.
- This option will deactivate the chosen Team Member. The Status will be updated to Deactivated and the Last Login field will be cleared. The Account details are not deleted from WISdom and may be reactivated via the Activate option.
- The Activate option activates a deactivated user.
- This option will not appear for active users.
- When selected, the account will be reactivated and a new invite will be sent to the account email. The Team Member will be required to create a new password as part of the activation process. If their MFA is not longer valid or not set up, they will be required to define the MFA method.
- Delete deletes the user.
- When the Delete option is chosen, the Team Member account will be removed from view in WISdom and the account will be deactivated. If an attempt to create a new account with the same email address, an error will display stating the account already exists. In this case, please open a support ticket to have the account reactivated at support@fortified.com.
Adding a New Account

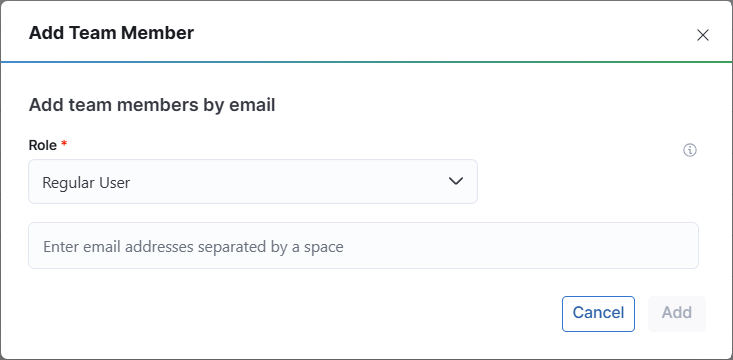
To add a new account to WISdom, click on the blue [+Team Member] button in the upper right corner of the screen. A popup will display where the information for the user account will be entered.
This popup requires a selection for the Role of the user(s) (Regular User, Administrator, or Reporting User) as well as the email address(es).
User types are as follows:
- Administrator - Full administrative access to all WISdom functions.
- Regular User - Read-only access to WISdom.
- Reporting User - Deprecated.
- MSP Administrator - Administrator over all child accounts.
- MSP Accounts Only
- Populate the required data, this activates the [Add] button in the bottom right corner, turning it blue.
- Once all information has been entered, click the [Add] button.
- Clicking the button will trigger the following:
- Create the credentials in Okta.
- Create the account in WISdom.
- Send an email invite to the address provided for the account.
- A message box will appear in the bottom right corner either stating success or an error if one is encountered
- Once the account is successfully created, it will display in the Team Member section with the Status set to Invite Sent and the Last Login set to the date/time the invite was generated
- The new user will receive an email from Okta instructing them to use the provided link to access Okta and complete the setup of their account.
- The link will be valid for 7 days.
- If it expires before the account credentials are configured, the user will need to be Reinvited (see Reinvited section below).
- Once the new account user uses the link, they will be taken to an Okta page to create a password the account
- Next, they will be asked to define their multi factor authentication (MFA) method(s).
- Once completed, they will be redirected to the WISdom homepage and be able to log into WISdom with their credentials.
Each new account added will have an initial status of Invite Sent. This status will remain until the user has successfully activated their account or an administrator changes the account to Deactivated. If the account is removed via the Delete option, it will be removed from the Teams page.